Gift Registry
Site visitors with an account can create personalized collections of gifts for special events and share the collection with attendees. They can specify quantity, add descriptions, track purchases, and add a private shipping address or pick up their items at the store.
Learn how customers create and manage their gift registries and how to manage customer-created gift registries. Site Administrators and Content Editors can manage gift registries.
Customer Creates Gift Registry
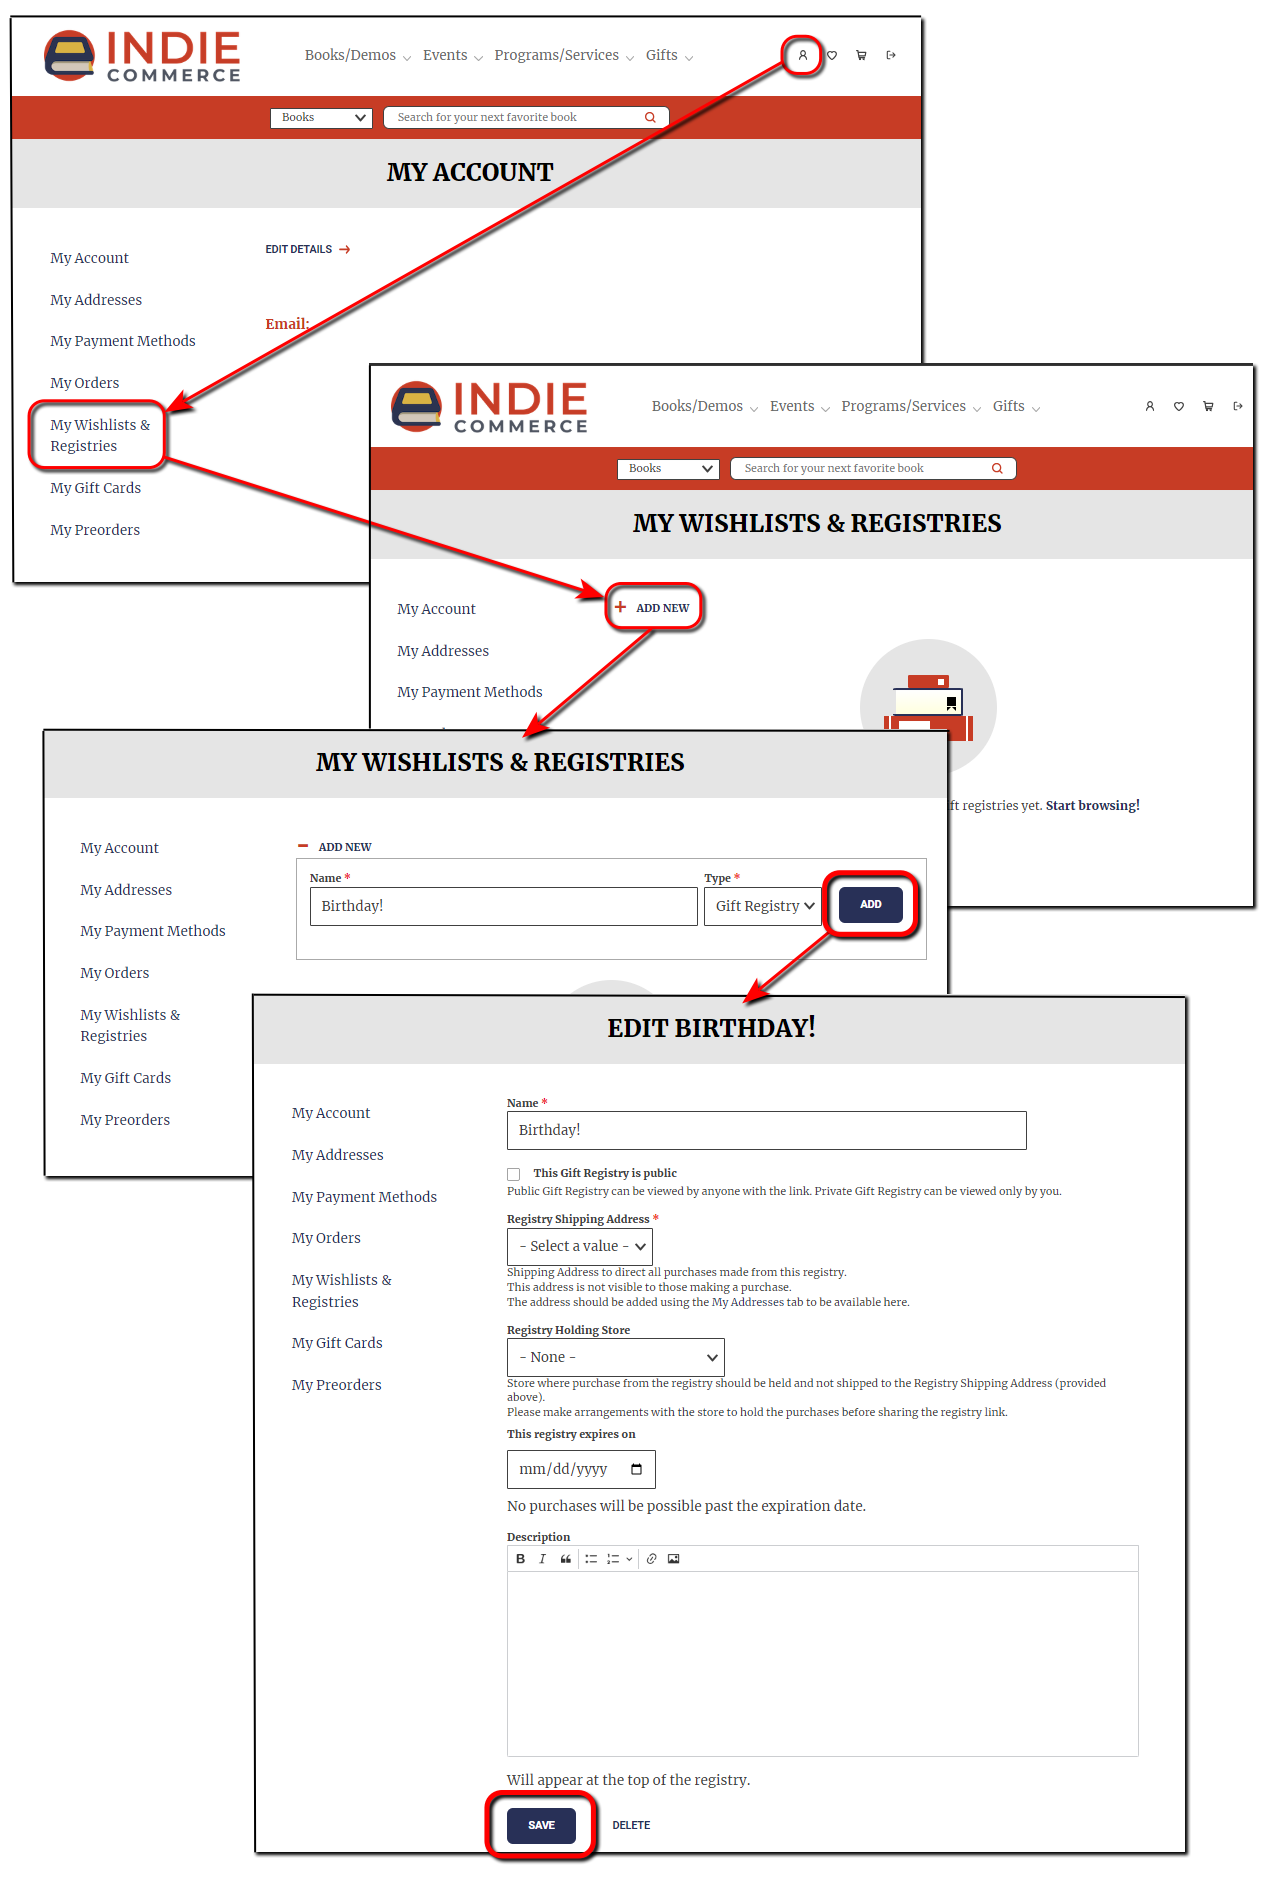
Customers create registries on their account information page.
- Select the My Account icon, then My Wishlists & Registries.
- Select + ADD NEW.
- Enter a Name and select Gift Registry from the Type menu, then select ADD.
- Select a Registry Shipping Address for purchases from the registry. Select My Addresses to add an address if no address displays.
- Select a Registry Holding Store if you want purchases from the registry held at the store for pickup.
- Select a date for This registry expires on to prevent purchases after the selected date.
- Enter a Description for the registry. You can include an image here, such as an invitation or event announcement.
- Select SAVE.
Add to gift registry
Customers can add books to gift registries from the Browse Books page, product lists, catalog or from the book product page.
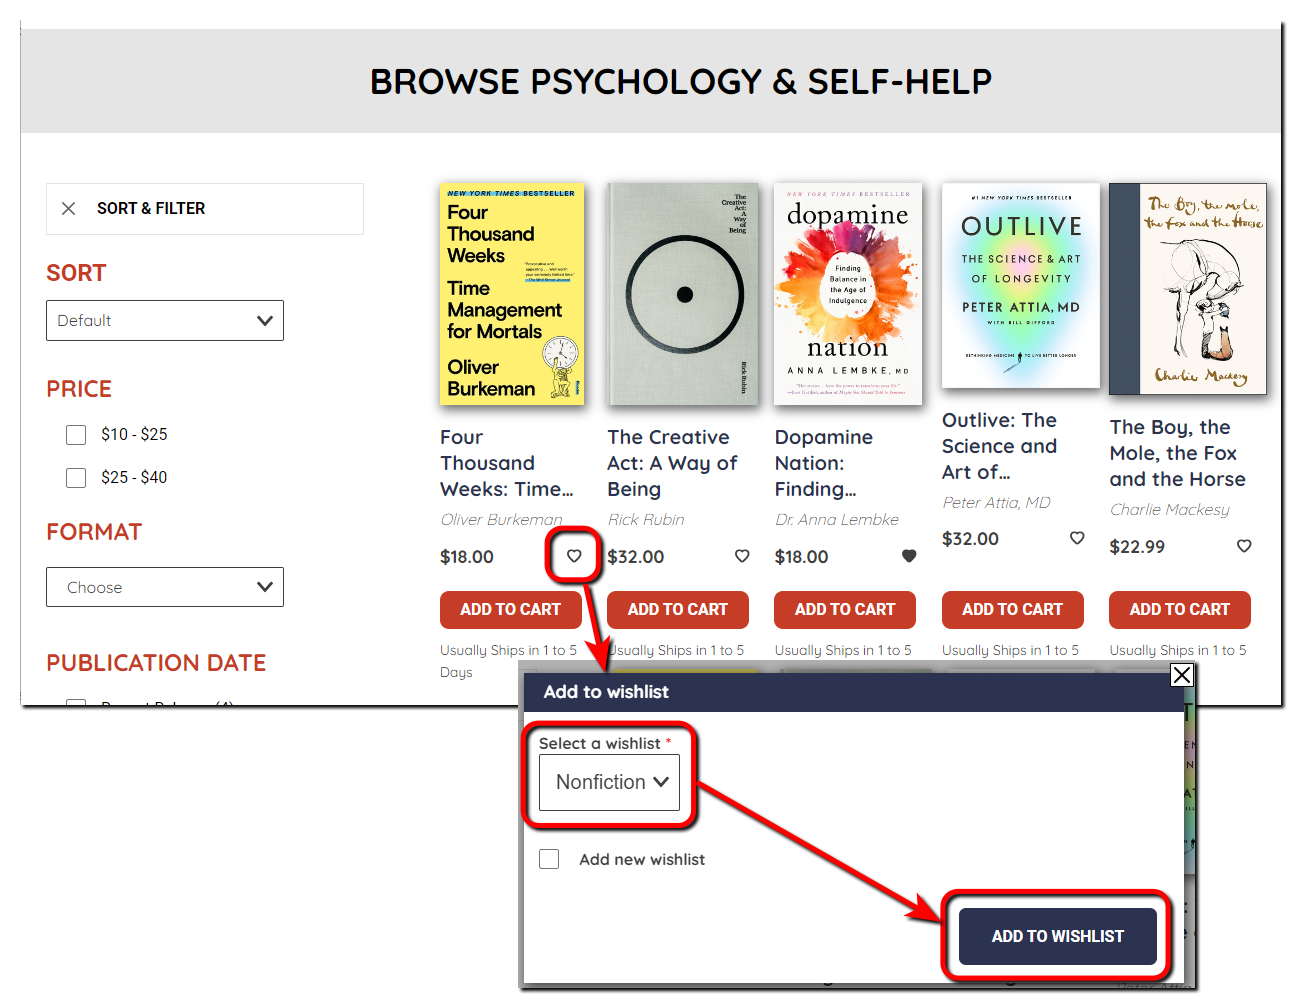
Browse Books page, Product List, Catalog
Select the heart icon next to the product price, Select the gift registry, then select ADD TO WISHLIST.
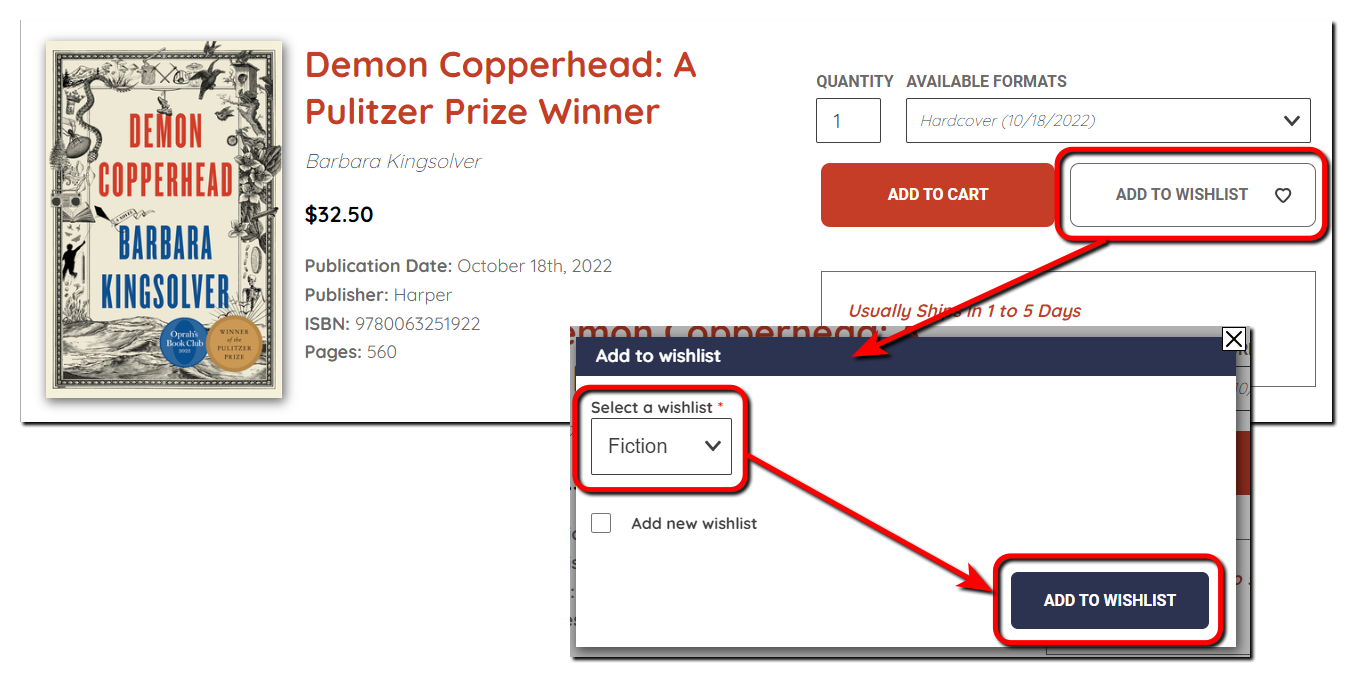
 Book product page
On the book product page, select ADD TO WISHLIST, Select the registry, then select ADD TO WISHLIST.
 My Wishlists & Registries
My Wishlists & Registries shows all the customer’s wishlists and registries.
They can select Delete to delete a registry.
Selecting a registry name displays the registry details.
Customers can email a link to their registry so others can purchase from it. They select Share, enter a Recipient email address, then select Send Email to email the link. They can also select Copy to clipboard to copy a link to the registry that they can paste anywhere.
Unchecking Public hides the registry from others.
They can also select Add to Cart to move the product to their cart or select Remove from Wishlist to delete the item from their registry.
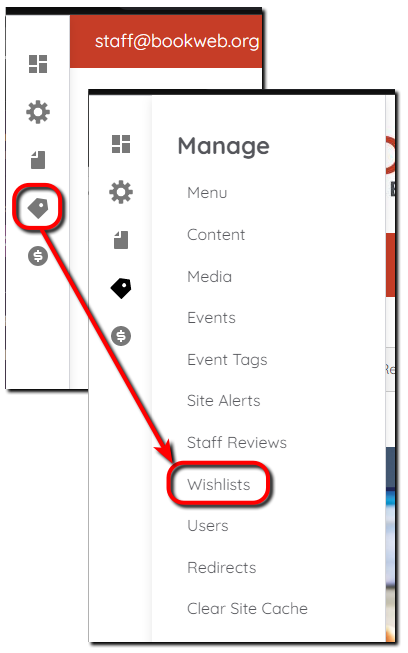
Manage Customer Registries
Select Manage in the left menu, then select Wishlists to manage customer registries.
All customer-created wishlists and registries display with the Name, Date created, and Customer email address. Select Name to alphabetically order wishlists, select Date to order by date created, or select Type to group by wishlist or gift registry. Select Name, Date, or Type again to reverse the order.
Select Items under Operations to view the items in the gift registry. Select + Add item to add products to the gift registry. You can also Edit, Duplicate, or Delete items using Operations.
Select Edit under Operations to update the Name, change the Registry Shipping Address, change the Registry Holding Store, change whether the registry is Public, change the date This registry expires on, and update the Description. Select Delete to delete the registry. While in Edit, select the Upload tab to bulk upload items to the registry.
To delete multiple registries, select the registries, then select Apply to selected items, and select Delete to confirm deleting the registries.